
[Today’s post about the dreaded flicker made possible by JTF Awesome Team Member, Propper]

Just The Tip: RMR’s, 3 Ways [or More] to Fix the Flicker
Dave Merrill
If you’ve shot an RMR equipped handgun for any length of time, there’s a good chance you’ve experienced the dreaded flicker. What this amounts to is that your dot will dim, flicker, and sometimes outright disappear under recoil. This happens when the battery connection inside the optic doesn’t remain constant; a loose wire in a cellphone charging cable isn’t a terrible analogy.
It can be frustrating when it crops up, but thankfully we have multiple solutions available. All of them are relatively inexpensive, and some of them might not even violate your warranty. Let’s go through em’.
Start with Quality
As Benjamin Franklin notably once stated “an ounce of prevention is worth a pound of cure.” That can certainly apply to this situation. A “one size fits all” pistol MRDS mounting solution certainly sounds appealing, but you can run into some issues.
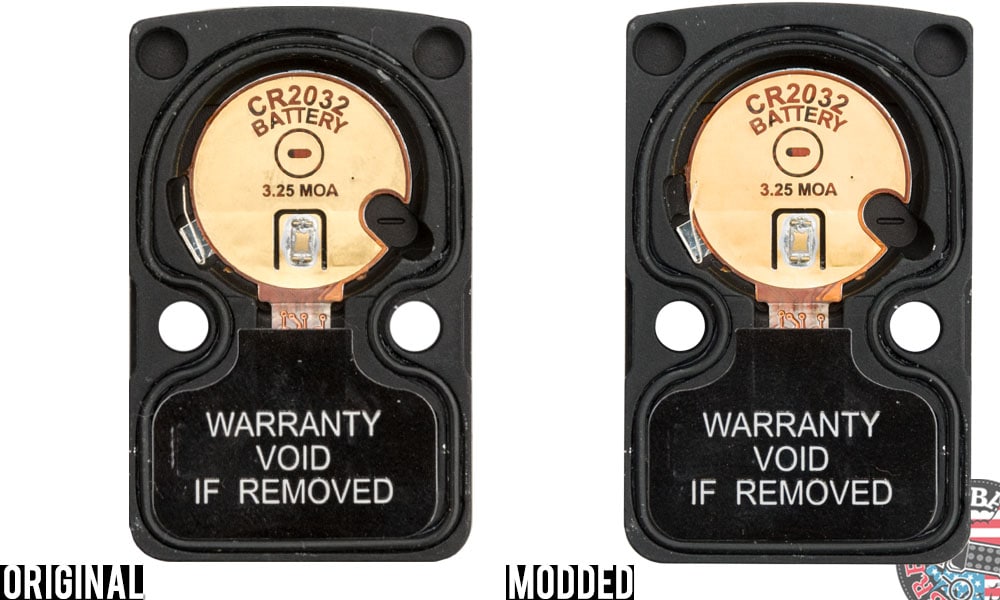
Though it’s better than it used to be, Trijicon RMR bodies aren’t sized perfectly uniformly. When the RMR was initially developed, it was meant to hang out on top of an ACOG or offset from a variable scope on a rifle, so variations in body size didn’t matter so much. However, when you’re recessing into a pistol slide, how precise the RMR fits can make a big difference.
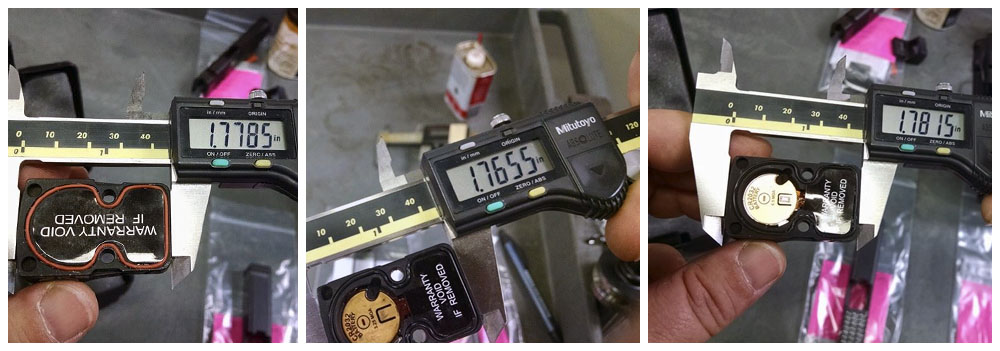
[Above photos from ATEi Facebook page here]
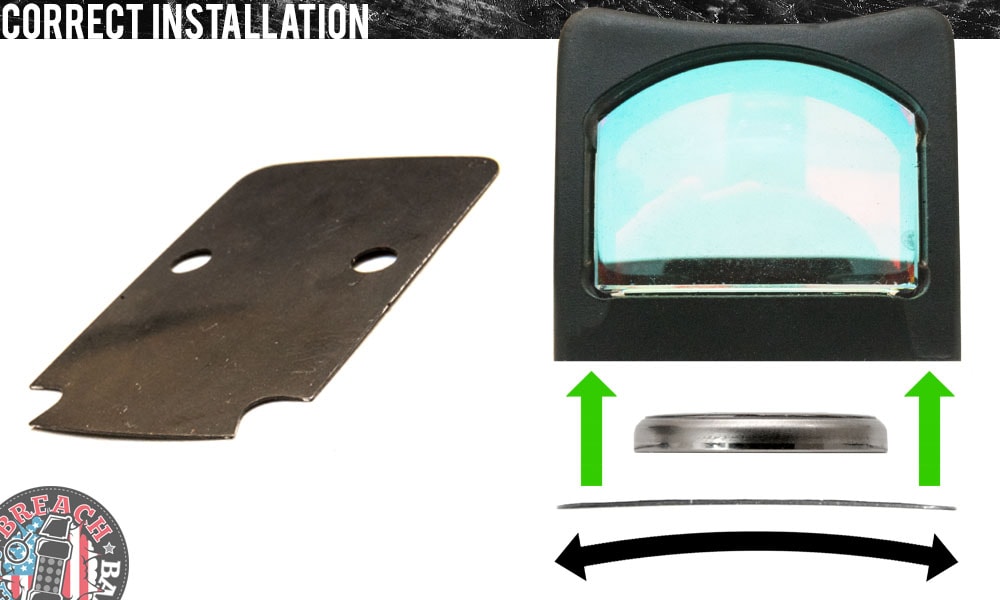
Install your Sealing Plate Correctly
Some RMR sealing plates are slightly curved (we can’t speak for all, since N+1 aftermarket plates are available). If you have one that is, during installation ensure that the arc is upright so it can help keep the battery in place.
The Bends
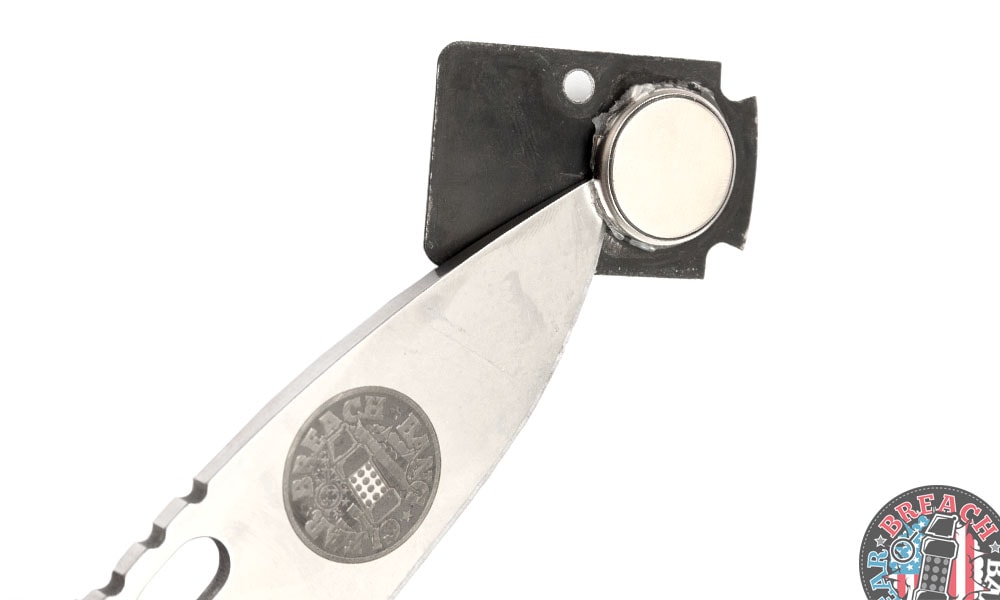
First explained to me by Doug Holloway of ATEi (who is a great person to go to for slide work BTW), with this method you bend your RMR battery contact slightly inward. This allows for consistent contact regardless of what lateral position recoil or other movement pushes the battery.

Grab a chopstick you saved from your last pseudo-Chinese food binge (because you used a fork anyway), and whittle it down. You can use basically anything non-conductive for this (tweezers from an electronics repair kit may be ideal). Carefully bend the battery contact inward; do your best not to reach the elastic limit and break it.
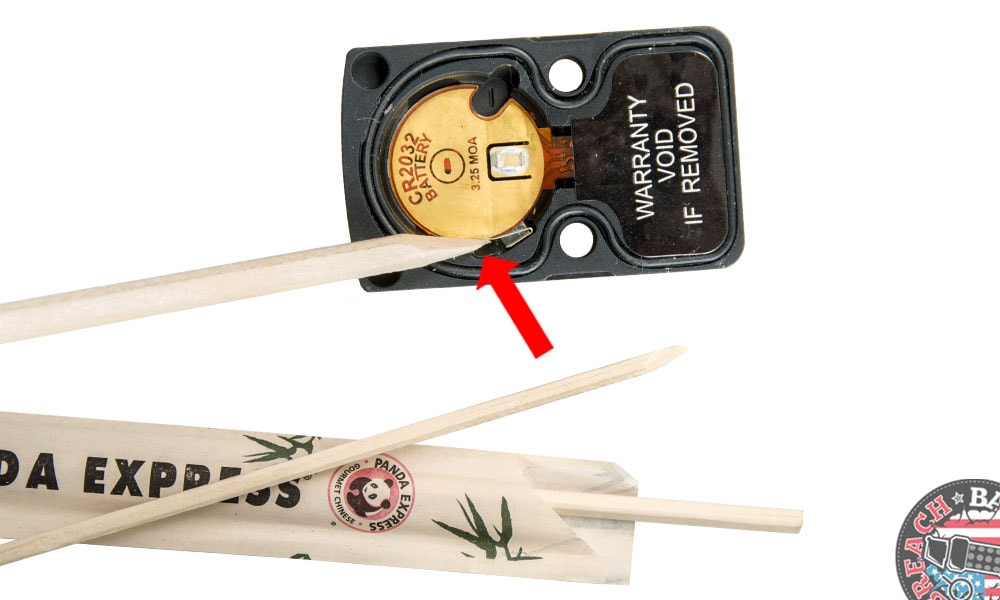
After:
Some have even gone so far as to insert a wedge or foam block between the connection and the RMR body to ensure constant pressure.
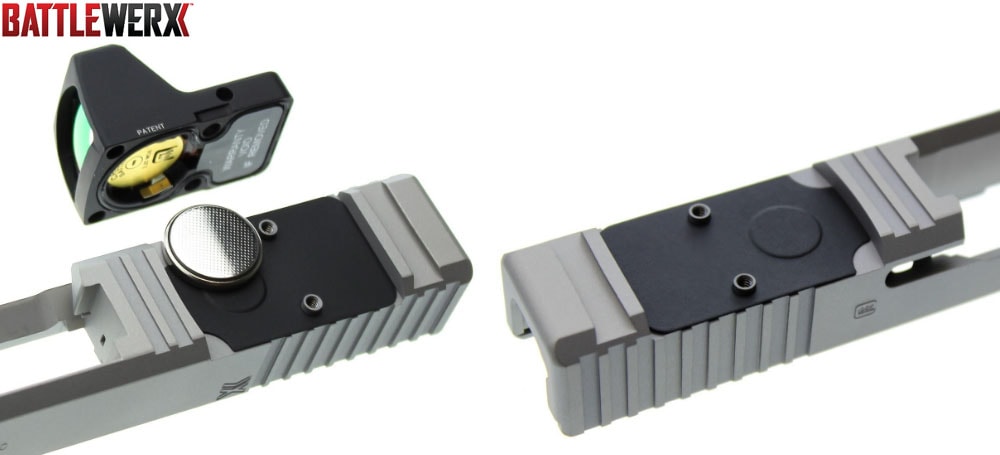
Aftermarket Sealing Plates
I can’t personally speak to the efficacy of this one (it’s a relatively new design), but this aftermarket item from Battelwerx makes sense. The plate is designed to keep upward pressure on the battery and contacts to prevent any electrical disconnection, though it looks like lateral battery movement still may be possible. At $9-11 depending on options (including one for MOS-series Glocks) it doesn’t cost much more than a regular OEM sealing plate. Speaking of which, what the hell Trijicon? Why not include one standard?

For More than Just Shoes
I’m not sure I’ve ever used Shoe GOO on footwear, but I’ve certainly used it for a bunch of other stuff. You might have some of this around the house.
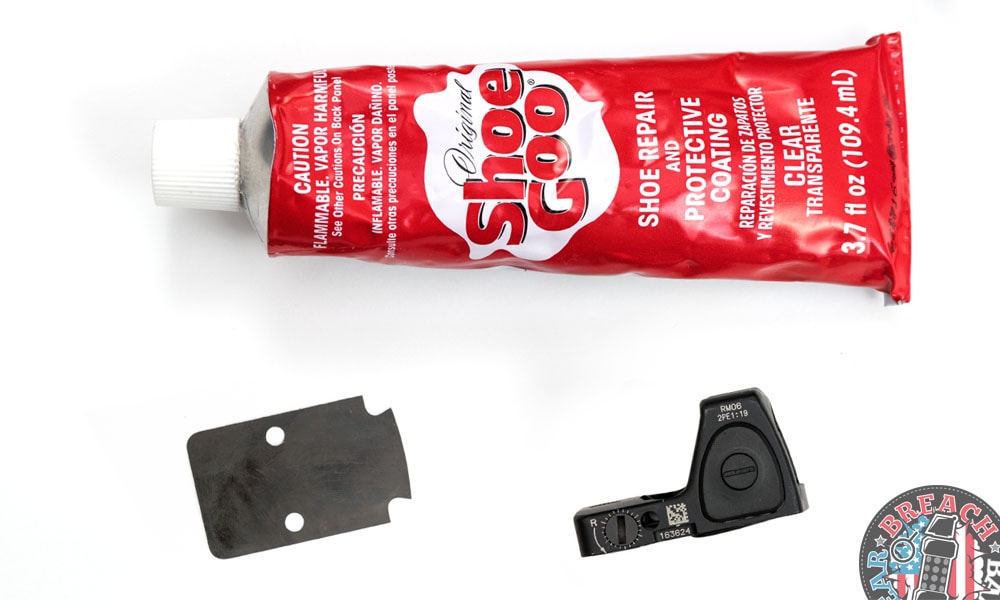
This method was first brought to my attention by Gabe Suarez. Basically, you apply a little dab of Shoe GOO between the sealing plate and battery. Our version is a little different than his, but it’s the same concept. Apply a little bead of Shoe GOO to your sealing plate directly beneath the battery. Don’t use too much–you don’t want Shoe GOO all over your internals. Install the RMR and completely torque it down while everything is still gooey.
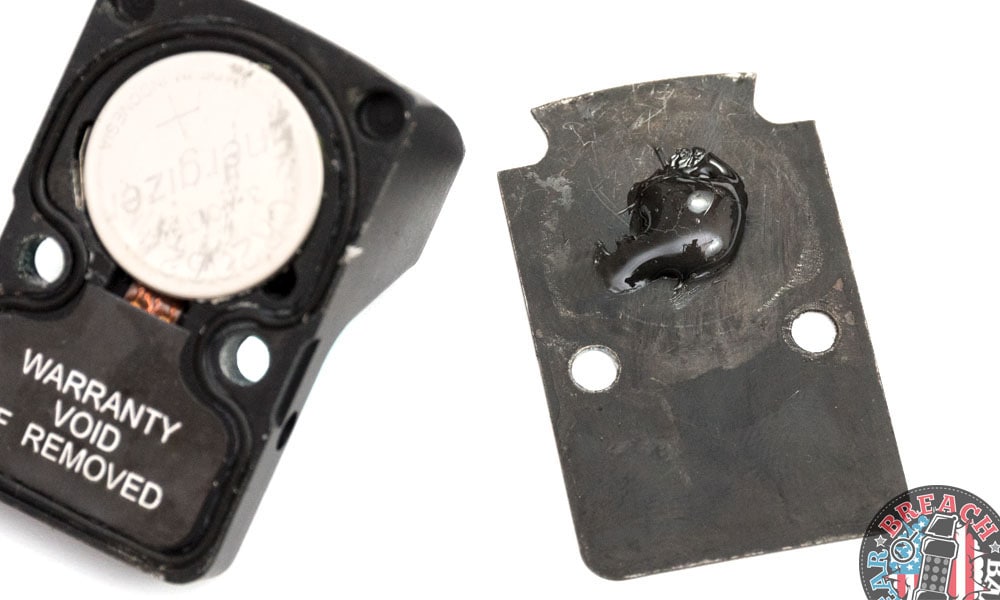

Same idea as the aftermarket plate, and with a bonus. The Shoe GOO ensures the battery stays high into the optic, prevents lateral movement of the battery itself, and furthermore may offer a bit of cushion under recoil. I’ve found this method to work very well at quashing flickering issues. When the time comes to change batteries, you’ll find your CR2032 is now glued to your sealing plate. Don’t worry about this, as it’ll peel right off with any sharp object.
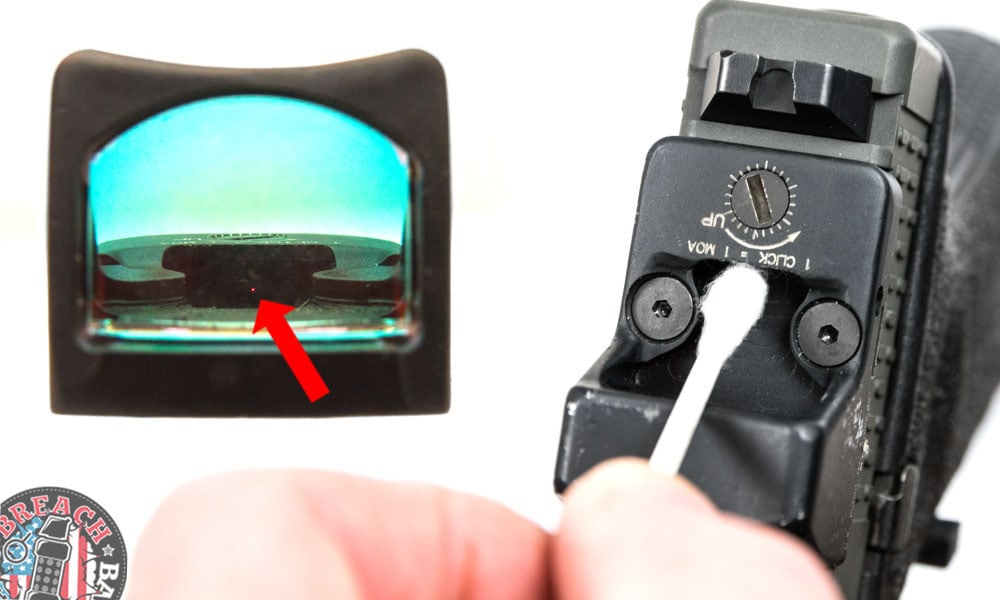
An Extra Tip
Do you find your dot less crisp than before? If you’re carrying with a MRDS it will get filled with all sorts of debris and belly button hair and…. Anyway, give it cleaning. Canned air, lens wipes, and Cat Crap or RainX (to prevent fogging) goes a long way. But also ensure you wipe your emitter. A dusty emitter will produce a dot that looks like dick when projected even on the cleanest window.
By no means is this list isn’t all-inclusive. Many will combine multiple approaches to attack the problem like the malignant cancer that it is. Do you have a special method to stop the flicker?
-DFM
Mad Duo, Breach-Bang & CLEAR!
Comms Plan
Primary: Subscribe to our newsletter here, get the RSS feed and support us right here.
Alternate: Join us on Facebook here or check us out on Instagram here.
Contingency: Exercise your inner perv with us on Tumblr here, follow us on Twitter here or connect on Google + here.
Emergency: Activate firefly, deploy green (or brown) star cluster, get your wank sock out of your ruck and stand by ’til we come get you.

You can learn more about the author by following him on Instagram, and you can contact him at Merrill(at)BreachBangClear.com.

More about Propper: Propper was founded in 1967 by William T. Propper, an entrepreneur with a passion for manufacturing. With hard work and a dedicated staff, Propper eventually landed its first government contract with the U.S. Navy, manufacturing caps known as “Dixie cups.” As the years marched on, they grew their business – and their reputation for quality.
Today, Propper continues to design and manufacture gear for tactical, law enforcement, public safety and military professionals that works right, right when it’s supposed to. Checkout our shenanigans with them at this year’s SHOT Show here. Follow ’em on Instagram, @wearpropper. They are also on Facebook.


I had the same issue and my solution is still working well and is very easy. Similar to your method, I simply cut a small snippet off a rubber band and wedged it behind the battery contact so it puts extra pressure on the contact and doesn’t risk over bending the contact itself.